
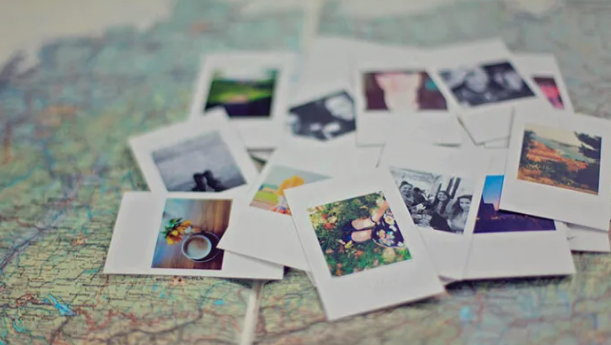
Every vacation leaves behind hundreds of photos, sunsets, family selfies, beach views, city streets, mountain landscapes, and random moments that somehow become your favorite memories later. But in my experience, taking great holiday photos is only half the process. Editing them properly is what truly brings those memories back to life.
The goal of editing holiday photos is not to make them look fake or overly filtered. Instead, good editing should recreate the mood, lighting, and emotions you felt during the trip while keeping the image natural and authentic.
Over the years, I’ve tested everything from DSLR workflows in Adobe Lightroom to quick edits on my phone using Snapseed and native iPhone tools. And honestly, the biggest lesson I learned is that simple edits often work better than dramatic ones.
If you’ve ever wondered how to organize and edit your travel photos without feeling overwhelmed, this guide walks through a practical step-by-step workflow that keeps the process easy, fast, and enjoyable.
If you also enjoy capturing snowy mountain adventures during your travels, don’t miss Our Guide to the Best Places to Snowboard in Europe for inspiration on breathtaking winter destinations and unforgettable photo opportunities.
Overview
The best way to edit holiday photos is to focus on natural improvements instead of heavy filters. Start by culling your images and removing duplicates, blurry shots, or accidental photos. Once you narrow your collection down, improve composition by cropping and straightening your images.
Next, adjust lighting using exposure, highlights, shadows, and contrast to recover details and create depth. Fine-tuning white balance and vibrance helps colors look realistic without oversaturation. Many photographers also use Lightroom presets or filters to give their travel galleries a consistent aesthetic.
Popular editing tools include Adobe Lightroom Mobile, Snapseed, and built-in editing apps on iPhone and Android devices. These apps make it easy to create polished travel photos directly from your smartphone without expensive software.
Why Editing Holiday Photos Matters
When I first started taking travel photography seriously, I assumed expensive cameras would automatically create perfect images. But even the best DSLR or mirrorless camera benefits from editing.
Holiday photos often need small corrections because:
- Lighting changes constantly
- Shadows hide details
- Bright skies become overexposed
- Indoor photos appear too warm
- Smartphone cameras flatten colors
Editing helps restore balance while preserving the feeling of the original moment.
A properly edited photo can:
- Make landscapes more immersive
- Improve skin tones naturally
- Recover lost sky detail
- Add warmth to sunset scenes
- Create a consistent travel album
Most importantly, organized and edited travel photos become easier to print, frame, scrapbook, or turn into photobooks later.
Start by Organizing Your Photos
Before touching any editing sliders, I always organize my images first. This step saves an incredible amount of time later.
Create Travel Photo Folders
I usually separate images by:
- Date
- Location
- Activity
For example:
- “Paris July 2026”
- “Yellowstone Day 2”
- “Beach Sunset Photos”
This folder structure makes it easier to find images months or even years later.
If you use a DSLR camera like the Canon 5D Mark IV, creating folders directly inside the camera during the trip can simplify the workflow even more.
Back Up Everything First
One mistake many travelers make is editing photos before creating backups.
In my experience, the safest workflow includes:
- Cloud backup
- External SSD or hard drive
- Original RAW file preservation
Losing vacation memories due to accidental deletion is painful, especially after long trips.
Step 1: Cull the Clutter
One of the biggest editing mistakes beginners make is trying to edit every single photo.
Professional photographers call the selection process “culling.”
What to Remove
I immediately delete:
- Duplicate shots
- Blurry images
- Closed-eye photos
- Accidental pictures
- Overexposed frames
- Underexposed photos
This dramatically reduces editing time.
When I travel, I often shoot hundreds of images per day. Editing everything would feel exhausting, so narrowing the gallery down to the best storytelling images keeps the process manageable.
Use a Story Arc
A helpful trick is organizing photos like a visual timeline:
- Morning coffee
- Airport arrival
- City exploration
- Sunset views
- Nightlife moments
This creates a more emotional and cohesive gallery.
Step 2: Crop and Straighten Your Images
Good composition instantly improves travel photos.
Even strong images can feel awkward if:
- Horizons are tilted
- Subjects are centered poorly
- Distracting objects appear in corners
Use the Rule of Thirds
I often place subjects slightly off-center because it creates a more natural composition.
For example:
- Place people beside landscapes
- Position sunsets near upper thirds
- Align horizons properly
Remove Distractions
Cropping helps remove:
- Random tourists
- Trash cans
- Street signs
- Unwanted shadows
Sometimes a simple crop completely transforms a photo.
Step 3: Adjust Exposure and Contrast
Lighting adjustments are usually the most important part of editing holiday photos.
Most images benefit from small corrections rather than extreme edits.
Exposure
Exposure controls overall brightness.
I typically:
- Brighten dark travel photos slightly
- Avoid over-brightening skies
- Keep highlights natural
Shadows
Bringing up shadows helps reveal hidden details, especially:
- Faces under hats
- People standing in shade
- Dark interiors
Highlights
Reducing highlights recovers details in:
- Clouds
- Beaches
- Snow
- Bright windows
Contrast
Adding a small amount of contrast gives images more depth and energy without looking unnatural.
Step 4: Fine-Tune Colors Naturally
Color correction is where many holiday photos start feeling more cinematic.
But subtlety matters.
White Balance
White balance fixes color temperature issues.
For example:
- Indoor lighting often looks too orange
- Cloudy outdoor photos can appear blue or flat
Warming or cooling the image slightly creates a more realistic result.
Vibrance vs Saturation
In my experience, vibrance works better than saturation for travel photography.
Why?
- Vibrance boosts muted colors naturally
- Saturation affects everything equally
- Too much saturation makes skin tones orange
A gentle vibrance increase usually looks cleaner and more professional.
Step 5: Apply a Consistent Style
One thing that separates polished travel galleries from random snapshots is consistency.
Use Presets or Filters Carefully
I often apply a light preset or filter to create:
- Warm travel tones
- Bright and airy aesthetics
- Moody city edits
- High-contrast black-and-whites
But I never rely on one-click edits alone.
Every image still needs small individual adjustments because lighting conditions change constantly during travel.
Keep It Natural
Over-editing usually ruins holiday photos.
Common mistakes include:
- Over-sharpening
- Excessive HDR
- Unrealistic sky colors
- Heavy skin smoothing
The goal is enhancement, not transformation.
Best Apps for Editing Holiday Photos
You don’t need expensive desktop software anymore to create professional-looking travel images.
Adobe Lightroom Mobile
This is still my favorite mobile editing app.
Why it stands out:
- RAW photo editing
- Selective masking
- Presets
- Exposure recovery
- Cloud syncing
It works well for both quick edits and advanced travel photography workflows.
Snapseed
Snapseed remains one of the best free editing apps available.
Features I use often:
- Selective brushing
- Healing tool
- Structure adjustments
- Precision editing
It’s surprisingly powerful for a free app.
Native Phone Gallery Editors
Modern iPhone and Android gallery tools are far better than most people realize.
Built-in tools now handle:
- Cropping
- Straightening
- Exposure
- Contrast
- Color adjustments
- Auto-enhancement
For casual travelers, these tools are often enough.
My Personal Holiday Photo Editing Workflow
Over time, I developed a simple editing routine that keeps everything organized.
Here’s the workflow I personally follow:
- Import and back up photos
- Create folders by date/location
- Cull duplicates and blurry shots
- Crop and straighten
- Fix exposure and contrast
- Adjust white balance
- Add vibrance carefully
- Apply a subtle preset
- Export organized JPEG files
- Save RAW originals separately
This process keeps editing efficient without feeling overwhelming.
What to Do With Your Edited Holiday Photos
One of the best parts about organizing and editing travel photos is actually using them afterward.
Create Photobooks
Travel photobooks preserve memories beautifully and tell a complete story of the trip.
Print Wall Art
Landscape shots from:
- National Parks
- Beaches
- Mountain ranges
- City skylines
often look incredible as framed prints.
Build Travel Scrapbooks
I also love combining printed photos with:
- Postcards
- Maps
- Ticket stubs
- Travel notes
It makes vacations feel more personal and memorable.
Create Slideshows
Slideshows with music can turn a folder of photos into a cinematic memory experience.
Common Holiday Photo Editing Mistakes
Here are a few mistakes I learned to avoid:
- Editing every image heavily
- Oversaturating colors
- Ignoring backup systems
- Forgetting to straighten horizons
- Applying the same settings to every photo
- Overusing sharpening and HDR effects
Simple, balanced edits almost always age better.
Final Thoughts
Editing holiday photos should feel enjoyable, not stressful. In my experience, the best travel galleries come from small, thoughtful adjustments rather than dramatic transformations.
By organizing your photos properly, culling unnecessary shots, improving lighting, correcting colors, and applying a consistent style, you can turn ordinary vacation snapshots into polished memories that truly reflect your experience.
Whether you edit with Adobe Lightroom Mobile, Snapseed, or your phone’s built-in gallery app, the key is consistency and restraint. A clean, natural-looking image will almost always feel more timeless than an over-processed one.
At the end of the day, holiday photography is about preserving moments, emotions, and stories. A good editing workflow simply helps those memories shine a little brighter.